


Throughout the music video project, I have notably employed a wide variety of different recent media technologies in my work in order to aid my success in meeting the brief. Arguably, the majority of the technologies used were deliberately chosen, however, as a teenager in today's society, I am aware that there are various technologies and platforms which I have used without thinking twice about.
Research and Planning
Pinterest
Follow Latymer's board Group 5 - Promoshoots on Pinterest.
 | |
|
We also downloaded Hangouts- an app produced by Google which allows video conferences via google accounts. This was especially useful as it meant that when not at school, we could still make decisions and discuss plans together. Furthermore, as a google product, it already had other youtube products integrated into it such as search and youtube, making sharing influential videos with one another much easier and quicker.
Snipping tool
The video below is a quick example of how I used the snipping tool to capture elements of different artists websites:
Google Drive
Google drive was great as it meant that we did not have to assign singular documents to specific individuals- improving the overall group effort and quality of research and planning. However, one of the major problems that we noticed with drive was that was very slow when being used by all of us at the same time, and experienced occasional bugs- such as freezing, crashing or not saving, therefore we made sure to back up all of these documents in more reliable software such as Microsoft word.
Facebook - By creating a Group chat and also secret group page, we had a hub for all f our research and planning decisions. Within the group, we posted visual ideas as well as descriptive posts on what we had to do and what changes to make to our ideas. The features of Facebook such as the seen receipt and the ability to comment meant that we were all aware of which group members had seen each new post, and could update them n other ways if so. Furthermore, the chat ability on facebook was extremely helpful in allowing us to coordinate our project together- an instant online chat. We all had smartphones, so were able to use the facebook messenger app to talk at any moment or on the go.
 |
| Our Facebook chat during the production stage |
 |
| We also posted images of possible costumes, and were able to individually comment on what we thought of them in order to decide as a group. |
YouTube - YouTube is the world's leading online video hosting site, it is free and very user friendly, therefore was perfect for when we needed quick access to other music videos or when uploading our own video content- it was useful for two things in particular:
1) It enabled us to create an online playlist of all influential videos we had discovered, accessible by all group members, which we could come back to later on.
2) The ability to upload our own videos- we used Youtube as the platform on which to host both our animatic and stealomatics- by reviewing uploaded content we were able to gain a feel as to what the final video would look like on the site.
Examples of our Youtube Uploads
Furthermore, one of the biggest advantages which we had in terms of new technology was that we all own smartphones. This meant that we could access the online and digital content via apps and mobile data, meaning that we could have on the move chats and compile research from any location. Overall this helped to bring us closer together as a group- and a lot of the time we found ourselves in a group text chat rather than the online based chat of Facebook due to the greater ease. Furthermore, when on test shoots, the high quality digital cameras on our phones proved very effective in capturing a few quick shots of what we wanted to achieve, and see whether the locations which we planned would be suitable. The access to social media also meant that we could upload and share other images and sound clips with one another instantly, again making the research process more effective.
Production
During the production stage, we found ourselves using many more new professional technologies- predominantly software for editing and producing, however, we also used a range of cameras and audio/visual technology.
IN THE STUDIO
As part of our project we were fortunate to have the opportunity to use the school's professional film studio for our performance footage. This was particularly beneficial to us as it meant that we could produce a higher quality, more professional final video. Here are the technologies which we used within the studio shoots:
Canon 5D Mark II - We were only able to use the 5D in the studio, due to its high value, however, the ability to use such a modern and high quality was very helpful- we used a Tri-pod to stabilise the image, and due to the manual abilities of the camera, we changed the zoom, focus, ISO and exposure accordingly in order to create the infinity backdrop. The 5D enabled us to shoot in full 1080p HD and in a 16:9 ratio format- perfect for a music video. However, there were a few disadvantages in using such a professional camera: the manual focus often meant that we lost clear focus when people moved on set, but did not realise until playback, his meant that in a few cases, we had to play in extra time for re shoots on later studio dates.

Canon 5D Mark II - We were only able to use the 5D in the studio, due to its high value, however, the ability to use such a modern and high quality was very helpful- we used a Tri-pod to stabilise the image, and due to the manual abilities of the camera, we changed the zoom, focus, ISO and exposure accordingly in order to create the infinity backdrop. The 5D enabled us to shoot in full 1080p HD and in a 16:9 ratio format- perfect for a music video. However, there were a few disadvantages in using such a professional camera: the manual focus often meant that we lost clear focus when people moved on set, but did not realise until playback, his meant that in a few cases, we had to play in extra time for re shoots on later studio dates.
Panasonic 40" Monitor/ TV - We used this in order to play back our footage whilst filming- it provided a larger clearer picture than the small monitor built into the camera. In this sense it was very useful as it allowed us to pick up on small flaws before and after shooting, to ensure our shots were as high quality as possible. However, as the monitor was connected via a HDMI cable, on various occasions it became disconnected, meaning that we had to be careful when moving the camera or screen.
Canon 500D - We used this as a more portable option when carrying out the on location promo shots: although it was not as high quality as the 5D, it was easier to transport, and still produce clean, HD images. We also attached a flash to this when shooting in the dark- meaning that we could combat the cloudy, dark lighting and the grain and shadows it produced.
Lighting- Utilising our access to the professional studio, we were taught by our media technician how to operate the sound and lighting network in order to aid us in our production. Although at first it was difficult to remember the various operations of the Zero 88 Leapfrog Lighting Desk, once we mastered it, we could quickly change lighting settings and create presets to switch between the different intensity and colours of the Arri 1000k lights- providing high quality lighting in our video to improve the final look. One inconvenience which we encountered with the lighting was that as all groups used the same studio, the lights got moved around- meaning that we spent a lot of time re-positioning them at the beginning of each shoot. If I were to repeat the project I would probably try to achieve all shots in a single shoot in order to avoid this task.
 |
| The Leapfrog z88 lighting desk |
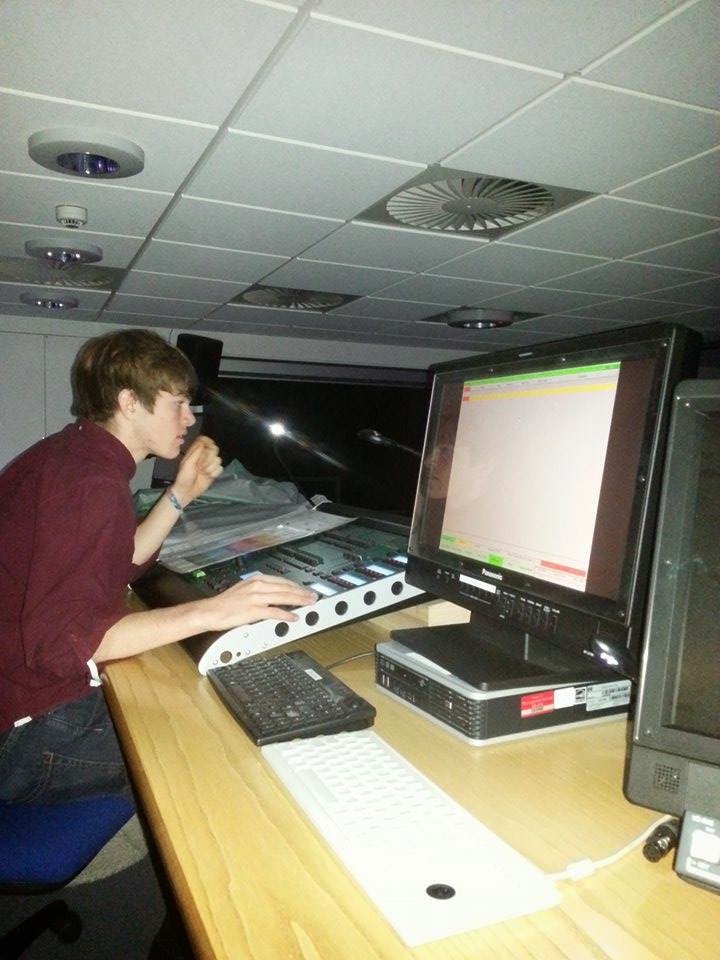 |
| Josh operating the lighting desk |
Using an aux chord, we were able to connect music playing via a Macbook pro laptop to play our track through the studio speaker system, making it easier for the performers to mime to the song within their performance.
Editing
When not on location shoots or in the studio, we were in our edit suite, constructing the 3 texts- this involved using a range of production and illustration applications- all based on the computer platform- some online tools and others applications.
Premiere Pro - The main program we used in the edit suite was premiere pro- I earlier mentioned how we had used it in he planning stage to construct our visual plans, however, now with more experience, we were able to not only create a timeline of all of the events, but then edit clips and their attached sound, as well as improving the visuals using grading of individual shots. Premiere was a great technology choice as it was quite straightforward yet had the capability for very complex editing when we needed it, and allowed us to fine tune every detail of the video to create a high quality final piece.
 |
| Creating a Timeline In Premiere |
 |
| Using the procamp editing tool |
 |
| Using the 3 way colour corrector |
However, we did experience one major problem with premiere- half way through editing, it crashed- arguably this was not the fault of the software, however, it made us realise that digital software is not completely reliable, and there is always the chance of an error causing everything to be lost. Fortunately we had recently saved our project on a back up harddrive, therefor non was lost- I Would advise others in future to do this as it completely saved our group from having to restart the video edit.
After Effects - For the shots which needed particular attention in terms of fixing bad lighting or grainy quality, we used the Adobe program After Effects. We used this earlier on when trialling VHS style shots, however, as we were only using real VHS for the final product, we used it now to improve and alter the analog footage in the cases which Premiere could not fix.
 |
| Using this menu, we adapted the individual colours in the shot |
 |
| Colour finesse 3- a more complex grading tool |
Although this was useful as it fixed the tiny faults, after spending a very long time on individual shots, we were somewhat disappointed by the outcome. This time consuming program did not have as great an impact as we believed it would, and could have been avoided. Overall I feel that unless we needed to make drastic change to the visuals, in future I would avoid After Effects, and only use it as a last resort in editing VHS, as arguably it destroyed the authentic look of the shots.
Photoshop - Photoshop was the main program which we used to create the album cover. I had particularly good experience with photoshop, therefore using this interface came as an advantage.The gif animation below shows the development of our final album cover from start to finish:
 |
| An animation deconstructing our album cover- starting with the finished product and ending with our initial efforts. |
Illustrator
When creating individual details for the NTLS brand, we found Adobe llustrator very useful. After Josh had sketched the Logo for the Band, we used illustrator to scan it onto the PC and convert the sketch into a digital logo :
Although the process of individually tracing every detail of the logo with a digital drawing tool in Illustrator was time consuming, it was certainly worth it, as the resulting logo was high quality ad professional.
I also used Photoshop in order to create realistic looking products to sell in the online store- taking plain items of clothing and accessories and adding the NTLS graphics:
 |
| A basic black long sleeve t-shirt graphic which we took from an online store. |
 |
| The same T-shirt with our photoshopping- the NTLS logo |
Wix
| A screenshot of the Wix homepage |
In order to create our real, working website, we used the online website creator www.wix.com. Wix is a site which runs on HTML 5, enabling the user to create an interactive, animated professional website. One advantage of Wix was the fact hat it was very straightforward to use, with clear buttons for adding any specific content we wanted, as well as the ability to upload images and other data onto your site- making its easy to create the unique look we were aiming for. However, one major disadvantage was that Wix only had the capability of being edited by one computer at a time, meaning that we had to plan out when we would edit in order to prevent losing any changes- however we got around this by creating a timetable of who was editing and when- assigning specific roles. Overall, I was very pleased with the finished site, which can be viewed by clicking the link at the top of the page.
The video below is a virtual tour of our website with commentary which we recorded using CamStudio:
VHS
Although we did employ all of these new technologies to create a symbiotic connection of various media platforms and formats through synergy, we also used older, more outdated technology in order to create a reference to the past through our use of a non digital Compact VHS camera. We decided to use this to give the narrative footage a post-modernistic feel, influenced by the work of Director Daniel Wolfe. specifically his 'Blind Faith' video. Although this was a risky decision, as the VHS camera had a few negatives: a very limited memory capacity and battery life, we stuck with our initial idea and the results were more than satisfying.
 |
| The date text in the shots |
However, when editing the footage, we noticed two new issue: the first being that the camera only shot in 4:3, meaning that we had to stretch the footage in order to remove the black bars shown in the video, as we were told that this did not fit in with the style of the video. Secondly, the camera also recorded with a date in the bottom corner of the screen, however, this was again easily solved- we simply cropped this out in premiere pro.
 |
| This screenshot of the Music video playing online in the Youtube interface shows how the date text is not visible in our final product |
Evaluation
The evaluation stage saw us switch from the more complex computer software used for editing to more simple online visual based tools used for presentation. I tried to utilise as many web tools as possible to present my final retrospective of the product, as well as some hardware to develop the presentation:
CamStudio- This is a screen recording application which I used to create a virtual online tour of our site for uploading youtube as evidence on my blog. Camstudio was beneficial in the sense that it was very easy to use- offering one click recording. However, the processing and tracking of my movements in the recording was often low quality or kept freezing- meaning that I could rarely record successfully. If I were to create another similar evaluation, I would use a more professional, reliable screen recording software such as that offered in Quicktime player..
 Microphone- We used the Blue Yeti, a HD microphone, in order to create voice recording to accompany the Website tour captured on cam-studio. This was really easy to use- plug and play, and meant that we had did not have to amplify the sound, as it captured a very clear sound.
Phone camera- When interviewing peers to receive feedback, we used our mobile phones to record a HD video interview with our peers to see what they had to say about the first draft of our final cut. Having a portable device with HD recording capability was More time efficient and meant hat we didn't have to borrow a camera- with mobile editing capabilities meaning that the entire video could be made on a phone.
Surveymonkey - Surveymonkey is a website which allows users to create basic audience and product research surveys for free, and provides the capability to collects and collate the results. Although the features of the free version were limited, it was still very effective in providing a quick and convenient way of gaining text-based short form feedback. with graph creating and quantitative data analysis capability
 |
| An example of the digital feedback on a survey question provided by survey monkey |


We used Facebook to share the survey->
However, due to the fact that we shared our survey to all online friends, we did get a few unhelpful feedback answers, however this was easy to solve- we just deleted the silly answers!
 |
| Unhelpful surveymonkey feedback |
Google Slides
Another feature of Google drive is Google slides. This is essentially a free powerpoint presenatation creator. However,this was really useful because I could create the presnetations and then publish them online to be embedded into my blog. However, one negative aspect is that the sizing of the slideshow is autoatic so fills up a large part of the screen on the blog.
Another feature of Google drive is Google slides. This is essentially a free powerpoint presenatation creator. However,this was really useful because I could create the presnetations and then publish them online to be embedded into my blog. However, one negative aspect is that the sizing of the slideshow is autoatic so fills up a large part of the screen on the blog.
Padlet
The content below is an example of the web tool Padlet I created to show how it works:
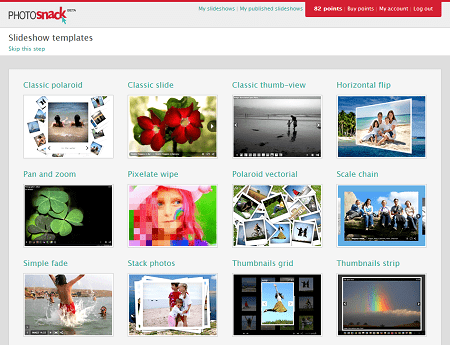
PhotoSnack
I used Photosnack to upload screenshots of my evidence to create animated slideshows, and leave comments and titles on each picture to explain what they show. However, a key problem which I discovered was that the descriptions and titles of the images are not shown unless the view prompts for them to be shown by clicking a button- to tackle this, I have explained to viewers how to show the descriptions when viewing the show.
Examtime
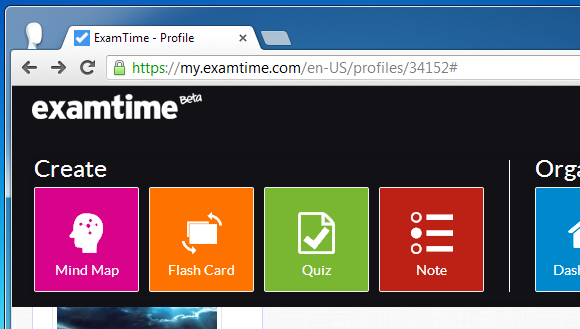 |
| Examtime- A webtool which offers the ability to create free online mindmaps |
 |
| Creating a mindmap |
I used Examtime, a website hosting tools designed for presenting and memorising knowledge, and with the mind map web tool, i was able to create my own maps to present what learning and actions and support these with visual evidence such as images added into the diagram. It was particularly useful due to how simple it is and didn't require any previous experience, however, in hindsight I would have used a tool that enabled videos as well as images, to make it easier to present my actions.
Imgflip
Imgflip
This is an online web tool making it easy to create moving image (GIF) video snippets out of existing video, or combine images and add text to describe what the clip shows. It is an instant creator, however, due t the professional standard of some features, they were restricted to paying members only, with a limit on the number of Gifs a free member can make.
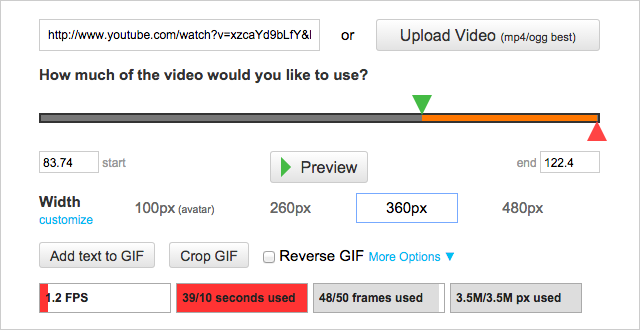
I found Imgflip especially useful as it enabled me to create GIF images to reflect what I was trying to show without having to process and upload a digital video. As the files created were images, they could then be downloaded before uploading them onto my blog. However, one of the main issues with GIF images was that they are not as high quality as the actual video footage, so some did not effectively present my evidence clearly.
Without the easy access to a multitude of new technologies- both online software as well as hardware such as cameras- we would definitely not have been able to succeed in meeting the brief to such a high standard. Although it took a while to get used to most of the technologies, most of them were designed for amateur users, therefore came as a great aid. In particular, I feel that the development of the Internet means that there is an online tool for most editing and production tasks, as well as a vast number of tutorials- the Internet has been the most vital technology throughout our project.
Without the easy access to a multitude of new technologies- both online software as well as hardware such as cameras- we would definitely not have been able to succeed in meeting the brief to such a high standard. Although it took a while to get used to most of the technologies, most of them were designed for amateur users, therefore came as a great aid. In particular, I feel that the development of the Internet means that there is an online tool for most editing and production tasks, as well as a vast number of tutorials- the Internet has been the most vital technology throughout our project.
No comments:
Post a Comment